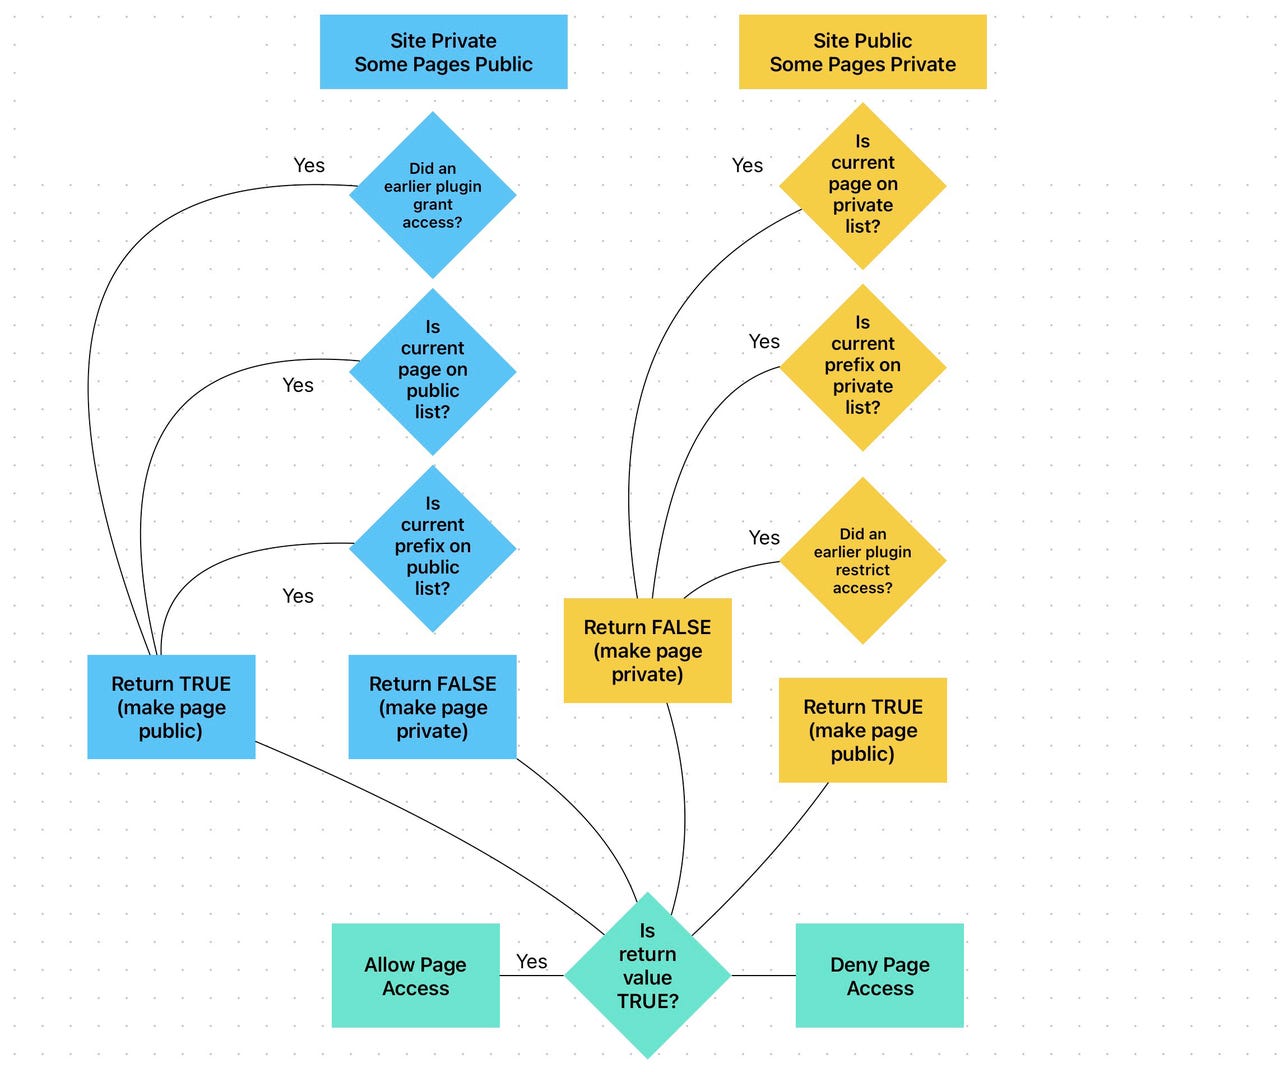
I created this quick flowchart when I was trying to map out how some program code worked. It really helped. David Gewirtz/ZDNET
Okay, look. I am very well aware that some people don’t like flowcharts. Educator Stephanie Lawless says, “a small part of me dies every time I have to draw an arrow to a box.” As far back as eleven years ago, Redditor zarcjap asked, “Are flowcharts even remotely necessary?” which triggered a 34 comment thread on the subject.
But here’s the thing: flowcharts are useful when you want them to be. I’m not talking about flowcharts as dictated by first year programming instructors, or flowcharts as mandated in a given management course. I’m talking about making flowcharts when you want to chart the flow of something, because you want to do it, or you think it might help you visualize something you want to get a better perspective on.
Also: How to take notes on your iPad with an Apple Pencil
In my case, I was trying to figure out why a piece of code of mine was behaving badly. After walking through it with the debugger numerous times, I decided it would be easier to draw the flow and stare at it for a few minutes. I have Apple Freeform on my Mac. While Freeform is somewhat limited (especially on the Mac, where it lacks the iPad’s pencil for freehand drawing), it’s also very fast for putting together charts of basic shapes.
How to make a simple flowchart in Apple Freeform
To use Apple Freeform, you need to have an iPhone or iPad running iOS 16.2 or later, or a Mac running MacOS 13.1 or later. I’m using it on my Mac Studio, but you can use it on any of those devices in much the same way.
Once you open Apple’s Freeform, here’s how you can make a flowchart.
The shape selector is the icon with a square and circle on it. Just click it and you’ll see the shape selector options pane.
As you can see, there are a lot of categories you can choose from. I just used the basic shapes for my chart, but you’re limited only by your creativity.
Also: The best note-taking apps for iPad
Once you click on a shape to add it to your document, you can click on it once and change its color. Or you can click on it a second time and write some text inside the shape. One thing that makes Freeform fast is that the text size adjusts to the size of the shape as you write it.
Notice that there are three line types shown in the shape selector. The first two are the line and the arrow tools. They’ll draw a straight line or an arrow. They’re pretty much the same tool, because if you double click on either, you can choose whether or not to put an arrow head at the end and scale it up or down.
The real tool of use for our flowchart is the spline tool. That’s because this tool actually attaches to your shapes. Notice that when I drag the end of the curve over the square, the square highlights. That’s because it attaches to the spline.
The real helpful feature of this is once you attach two shapes together, you can move the shapes, and the spline will move with the shape. In the two images below, I just moved the rounded rectangle. The line followed along all on its own.
Once you’ve decided where to place your shapes and how to connect them, you can modify the connecting line. To do this, click the middle of the line. You’ll see a little connector dot and a menu.
If you use the curve option, which is what’s shown above, you can click the little green dot and move the center of the curve. If you use the right-angle option, you can move the dot to adjust how the lines draw between the shapes. Here’s a more pronounced curve:
And here’s a version where the lines are at right angles:
And that’s it. When I put together my chart, I just included the bare minimum to help me see how the program flowed. It took maybe ten minutes and I had an altogether better understanding of the program’s flow. This will also serve as a useful chart in case someone else needs to know the same thing.
What are some favorite features for flowcharts?
There are three favorite features:
- The ability to attach lines and reshape them, along with them moving as you move shapes.
- How text grows or shrinks automatically inside a shape, reducing the work you have to do.
- The fact that the overall canvas is essentially infinite, so you can build out the chart in any direction you need.
What are the limitations of Apple Freeform?
The product is clearly more powerful on the iPad. But my biggest complaint is you can’t save drawings in any format besides PDF. If you want to save a drawing (as I did to show you sample screenshots), your best bet now is to use a screenshot tool or program. We discuss how to generate screenshots in this helpful article.
How much does Apple Freeform cost?
It’s free as long as you have an iPad, iPhone, or Mac with the necessary OS versions. To recap, that’s 16.2 or better for iOS and 13.1 or better for MacOS.
More iPad tips and guides
You can follow my day-to-day project updates on social media. Be sure to follow me on Twitter at @DavidGewirtz, on Facebook at Facebook.com/DavidGewirtz, on Instagram at Instagram.com/DavidGewirtz, and on YouTube at YouTube.com/DavidGewirtzTV.


